This week's recipe was for cheesecake. I am not really a fan of cheesecake. I could pretty much go the rest of my life without eating another bite of cheesecake and never miss it. Are those gasps that I heard? For some of you, I'm talking crazy talk. I understand. I'll be back in full TWD swing next week with a recipe chosen by.... Dorie herself!
Ok, so breakfast. I love breakfast. I could, and do, eat any time of the day. Breakfast is just good food.
Here is a very common sight at our house:
It's a waffle iron. A pretty old and messy waffle iron now that I look closely at the photo, but anyway.
This is a slightly underdone waffle just coming off the iron. (It's because I put the extras in the freezer, and they brown and crisp up when I toast them.)
This is a yummy, crisp waffle just waiting for butter and maple syrup. Or peanut butter and jelly. Or peanut butter and maple sugar.
I never quite understood the pre-made frozen waffle thing. Waffle irons are pretty cheap, and I think they pay for themselves rather quickly. They are amazingly easy to make (thank you Alton Brown) Mostly, they are just good. You can play around and add cinnamon and vanilla. Or ginger and molasses. Or cocoa and orange extract.
Each batch makes plenty. So the extras go in the freezer for those during-the-week waffle breakfasts. So now I've taken away the "frozen waffles are so convenient" arguement.
Here's all I'm saying. Give it a try. It really does beat the boxed frozen version.
Oh, and this is an English Muffin that I tried making. Not very successful. For now, I'll stick with the store-bought kind. I'm open to recipes and/or suggestions.
Next week: French Pear Tart. See you then!
And running around the rest of the house as well. The life in my food, the food in my life, my life in food. My life is food? Eh, you get the idea.
Tuesday, December 30, 2008
Tuesday, December 23, 2008
TWD: Real Butterscotch Pudding
After all the cookies, I was happy to tackle something else. Last time we made pudding, it was amazing. I had high hopes for nothing less this time.
This recipe called for real scotch. Dorie recommends a single malt. I know for some of you, this was an issue. Why buy a bottle of scotch when you need only three tablespoons? I had no such problems. The husband is a..... collector of single malts. This is what I had to choose from:
Yes, there are eight bottles of scotch on my table.
So with the scotch procurement handled, I started on the pudding. Like the last time, it was an easy recipe. Not diet food for sure. Egg yolks, heavy cream, butter, and whole milk make up the bulk of the ingredients. And scotch.
I still hate the smell of boiling milk. I skipped the food processor for the pudding this time. I could tell a difference. This was slightly heavier and thicker. But, I didn't want to make the mess I made last time.
This pudding certainly isn't going to win any beauty contests.
We did have to dress it up a little. Whipped cream from a can is so much fun. And the cookie nestled in the bowl? Brown Butter Brown Sugar Shorties from Smitten Kitchen. It is a cookie more delicious than any cookie has a right to be.
Anyway, back to the pudding. I liked it. The girl and husband liked it as well. The boy liked the whipped cream and the cookie. It was pretty boozy. The alcohol doesn't cook out, so the scotch flavor is pretty prominent. I would make it again. For adults. No one was getting tipsy, but it did have a decidedly adult flavor.
I have another bonus side recipe. I found a great thing to do with the three egg whites that were left over after I made the pudding. Cinnamon Sugar Roasted Nuts. You know, similar to the ones that you can get at any county fair? I love these.
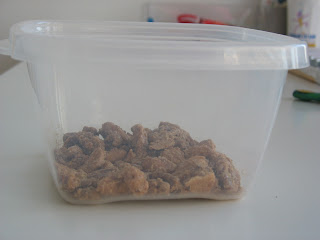
Slightly out of focus but delicious candied cashews and pecans.
Here is my sad, almost empty container.
I can't remember where I got the original recipe, but here's the version I use:
3 egg whites
1 T. water
1 T. vanilla
1 1/2 pounds of nuts (usually pecans, but I've used almonds and cashews as well)
1 c. white sugar
1/2 c. brown sugar
1 t. cinnamon
1 t. salt (if you use unsalted nuts)
Preheat oven to 250. Line a sheet pan with a Silpat or foil. Froth the egg whites with the water and vanilla. Toss the nuts in the mixture to coat. Mix the sugars, cinnamon, and salt (if using). Add to the nut mixture and stir well to coat. Pour onto pan. Spread the nuts to cover the pan. Bake for one hour, stirring every 15 minutes. Try to separate nuts with each stir. Depending on the dryness of the day or the liquidity of the eggs, it may take a little longer. These will dry out and crisp up as they cool. Store air tight as long as they'll last.
Thank you Donna from Spatulas, Corkscrews & Suitcases for choosing the pudding. She'll also have the recipe on her site for anyone who is interested. I'm opting out of next week's recipe. It's cheesecake, and we're just not cheesecake people here. I'll try to have something else interesting to show you.
•••• Edited to add -- I think I may have put in three tablespoons of scotch. That's why mine was so boozy. Ah well.
Tuesday, December 16, 2008
TWD: Linzer Sables
This is a tricky TWD month. We were allowed to make the recipes in the order than we saw fit. This was the recipe I was supposed to make when I made the Buttery Jam Cookies instead. I swapped. Like I said, tricky.
Anyway, a Linzer cookie, as far as I have gathered is a traditional shortbread cookie layered with jam and sprinkled with powdered sugar. A sable is a French butter cookie. Now just by themselves, those things sound wonderful. Dorie uppped the ante a little by making the cookies with ground nuts. It definitely adds a little something.
This was a pretty easy cookie to make. It came together well. I used ground almonds for mine. I've said before that I'm not a fussy cookie person. This verged on fussy for me. My rolling skills leave a little something to be desired. I rolled out my two pieces of dough into (relatively) level rectangle-like shapes. The two pieces of cling wrapped help keep it all neat. I used my 2" cookie cutter for the bases and "frames". I found this star cutter in a box of old cookie cutters from my mom.
Just a little tangent -- I know that I re-roll more than I should. It's just that wasting even a little dough kills me. Thank goodness there was no extra flour with the rolling. Ok, back to the main post.
My cookies baked a tad unevenly because they weren't all the same thickness. I sandwiched them with either raspberry or apricot jam. They actually turned out pretty well. They look nice, and they are tasty as well. I'm not sure that I'm rushing to make these again, but I'll keep them in the arsenal for an afternoon tea or something.
These were made with the star cut outs. Not as pretty.
Apricot jam. Mmmmm.
This recipe was chosen by Dennis from Living the Life. I should be back on track with butterscotch pudding next week. And it uses real scotch!
Tuesday, December 09, 2008
TWD: Grandma's All-Occasion Sugar Cookie
Another cookie with a mouthful for a name! This week I'm up to speed and doing what everyone else is doing.
I don't really have a "go to" sugar cookie recipe. I don't actually tend to bake many cookies that call for sprinkles and decoration. In a word, I am lazy. (I'll even admit to taking the easy way out on this one) I have made them in the past, and I like them. When I'm baking cookies, however, I usually go with something chunkier. Or chocolate. Which is interesting, because I almost like chocolate chip cookie dough without the chips almost more than with. But I digress.
These cookies were a pleasant surprise. They are an easy easy cookie to make. I used my stand mixer, and the dough came together in about five minutes. I did mix in the last bit of flour by hand. I chose to make slice and bake logs instead of rolling and cutting. See, I told you I was lazy. I put the logs in the freezer for about half an hour to speed up the process, and then kept them in the fridge until I was ready to bake. You can also make a couple of disks, and then do the roll and cut thing.
The boy helped me choose the sugar sprinkle colors. We chose to roll one roll in pink sugar. That made a pretty cookie with pink edges.
The second log got different colored sugars sprinkled on top. Green, orange, or yellow.
I like that the logs can be stored in the freezer for a while. This would be a perfect dough to have stashed away so that I could slice and bake pretty much at will. And I think the possibilities for variations are endless. I'm already imagining mini chocolate chips, or orange cream cheese frosting (I have to find that blog!), or a dab of jam, or crystallized ginger, or.... See. Endless.
This is definitely a keeper recipe. It's a good basic. Thanks, Ulrike from Küchenlatein for this choice. Next week I'm making last week's recipe. I know. It's confusing. You'll see. It all works out in the end.
Tuesday, December 02, 2008
TWD: Buttery Jam Cookies (Surprise!)
This is an interesting month for the TWD crowd. We've been given permission to make the December picks out of order! I know!
This was an easy cookie to make. The ingredients are all things I have on hand. Before I read the recipe, I was expecting this to be more like a thumbprint cookie. But, the jam gets mixed into the dough. I used a home-made cherry jam. (recipe here) It's a drop cookie, which was just right for my energy level. Instead of milk, I substituted egg nog. It's what I had, and I thought it might add an interesting taste note. There is also a touch of ground ginger in the recipe.
Look! Real cherries!
The dough was fantastic. The cookies, while they were warm were "eh". It was a good butter cookie, but there was no real flavor to it. I couldn't taste cherry, ginger, or egg nog. A few hours later, however, I had a change of heart. These are some pretty tasty cookies. The fruity flavor stands out a little more. The egg nog and ginger add a richness that really complements the fruit.
This one sounded yummy, and, to be frank, didn't require much effort on my part. My kind of cookie! After the food fest that was Thanksgiving, I needed a little bit of a break.
This was an easy cookie to make. The ingredients are all things I have on hand. Before I read the recipe, I was expecting this to be more like a thumbprint cookie. But, the jam gets mixed into the dough. I used a home-made cherry jam. (recipe here) It's a drop cookie, which was just right for my energy level. Instead of milk, I substituted egg nog. It's what I had, and I thought it might add an interesting taste note. There is also a touch of ground ginger in the recipe.
Look! Real cherries!
The dough was fantastic. The cookies, while they were warm were "eh". It was a good butter cookie, but there was no real flavor to it. I couldn't taste cherry, ginger, or egg nog. A few hours later, however, I had a change of heart. These are some pretty tasty cookies. The fruity flavor stands out a little more. The egg nog and ginger add a richness that really complements the fruit.
These are chewy cookies, and they just keep getting better with age. I would definitely make these again. I'm interested to try other jam flavors and see how they turn out.
Not the prettiest cookie I've ever made...
Heather of Randomosity and the Girl chose this recipe. Next week I'll have another of the December recipes. It's a mystery!
Saturday, November 29, 2008
The best appetizer ever, and why I'm an idiot
So here it is. The best appetizer ever. I have a cast of characters. I have the in process photos. I have the all ready to go in the oven photo. What I don't have is a photo of the finished product. Idiot. So, you're going to have to make these yourself and see what they look like.
Ready for all the ingredients? Here we go: pitted dates, parmesan cheese, thick-cut bacon.
Yup. That's it.
Pitted dates
Parmesan cheese cut into matchsticks
Thick cut bacon cut into thirds
Here's the instructions: Take a matchstick of cheese and put it inside the date. See how the pitting makes a nice hole just waiting for cheese? Ok, blurry hole.
And here it is all filled
Then you take a piece of bacon, wrap it around the date, and stick a toothpick through it. Strictly speaking, if your bacon is long enough, you don't need the toothpick. Put it on a foil-lined baking sheet. Put it in a 350 degree oven, and bake until the bacon is cooked. Usually that's around 20 minutes.
Now, if I wasn't such an idiot, you'd have a picture here of golden crispy bacon wrapped around a sweet, chewy date with just a hint of parmesan leaking out. These are best served warm. But seriously, even if they were cold I'd eat them.
They take very well to being made ahead of time. The day or two before you need them, but them together and throw them in a plastic bag and refrigerate. Bake them as needed.
I hope that was worth the build up! Enjoy!
Cookie Carnival: The Ultimate Chewy and Soft Chocolate Chunk Cookies
Whew! That's a name to rival Dorie!
I'm a chocolate chip cookie baker from waaaaaay back. It's the first cookie I ever made. I have the Toll House recipe memorized. I'm savant like that way. There are lots of Johnny Come Lately chocolate chip cookie recipes, but I tend to like my Tollhouse version.
Still, I was game to try this recipe. I do have a quirk about my chocolate chip cookies. I tend to halve the amount of chips needed. I really like the brown sugary taste of the cookie with just a hint of chocolate.
This was fairly similar to most other cookie recipes like it. There was the usual cast of characters. It made a medium size batch. They came together easily.
Here's what was interesting. I didn't really like these cookies when they were warm. I know! I was just as surprised. I thought it was just as well. I certainly didn't need any more cookies on my hips. Then, as I was walking past the jar the next day, I decided to try one. What a difference a day makes! The cookies had taken on a deeper flavor with a caramel note. They were really good! I may have to give these another go.
Cookie pyramid!
Mmmmm. Chewy and brown sugary and chocolatey!
You can find the recipe in this cookbook.
See you next month!
Monday, November 24, 2008
TWD: Waiting for Thanksgiving
Well, I'm not making the pie. (Pumpkin aversion, tree nut allergy at host's house) But I am making a roasted vegetable salad, an appetizer, and gingersnaps. When all is made and photographed, I will post.
See you all on Thursday! Or Friday. I may need a day to recover.
Happy Thanksgiving!
Wednesday, November 19, 2008
To all my TWD friends
I'm just going to apologize here. Normally, I try to comment on as many TWD blogs as possible. I love seeing what people have done. The variations and flavor combinations are interesting and adventurous.
But here's the thing. I have nothing good to say about rice pudding. Nothing. I tried to muster up some positive comments. Really. I did. But the thought of the stuff just creeps me out. Again, no good reason, but I can't do it. Looking at posting after posting of it was just too much for me.
So here's a blanket "Nice job on the pudding! I'm glad you enjoyed it." I'll be back next week oohing and aahing over the Twofer pie.
Tuesday, November 18, 2008
TWD: Arborio Rice Pudding
I have a confession to make. Rice pudding gives me the heebie jeebies. I have no good reason for it. I'm pretty sure I've never eaten it. But the thought of it makes me shudder.
However, my family has no such aversion, so rice pudding it is. I happened to own some Arborio rice from my one and only attempt at risotto. I think I need to try that again. Anyway, there were a few cooking steps. The rice is cooked with water, then drained and cooked further with milk and sugar. That was pretty much the main ingredients and steps. I found out through a comment that Dorie herself made that there was a typo in the book. The rice and milk are supposed to cook for 55 minutes and not the 35 minutes listed in the book. Oooops. Have I mentioned how much I can't stand the smell of boiling milk? No? Ok. I cooked my rice and milk for about 60 minutes. The liquid looked pretty well absorbed.
I decided to make two versions, the black (chocolate) and the white (vanilla). The chocolate version added chopped bittersweet chocolate, the vanilla version called for vanilla extract. Then it was into the fridge for a cool down. Plastic wrap went on top. I am anti-skin even on pudding I refuse to eat.
I dished out a little bit for the three members of the family who will eat rice pudding.
See, this week I got smart and put all the bowls together. Now we'll never know which was the boy's, girl's, or husband's. Bwah ha ha ha.
The verdict was pretty unanimous. Everyone liked the puddings. The rice was cooked enough, and it wasn't soupy as I'd heard from other bloggers. There was a strong preference for the vanilla version. I'm not sure I'll ever make this again, but if I do, it's the vanilla. I think if I'm making pudding again, it's Dorie's chocolate pudding.
I'm not making the next recipe. It's a Thanksgiving Twofer Pie. It's a double layer of pumpkin and pecan pie. First of all, my dislike of pumpkin is well documented, and second, we have a tree nut allergy at our Thanksgiving host's house. I will be making Double Gingersnaps, Cashew Brittle (for our house) and my favorite appetizer ever. Come back to see what it is!
Check out the recipe on Isabelle's blog: Les Gourmandises d'Isa.
Sunday, November 16, 2008
Waaaaay behind on my big bags 'o veggies
It's been a very long time since I've posted about much other than Dorie. We've been getting our Friday bag of fruits and veggies all fall. We've really enjoyed some of the pickings.
The squash has been really good. I've roasted it with butter and maple syrup. We've tried spaghetti, acorn, butternut, and one other that I couldn't quite identify.
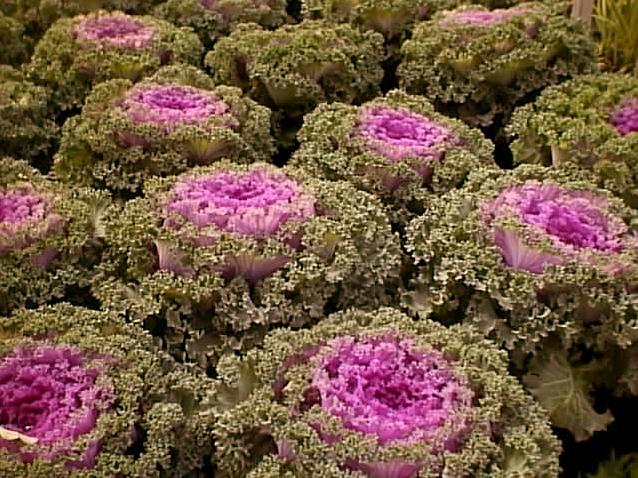
We've had greens in many many forms. Lots of kale, lettuce, cabbage, and a plant that I didn't know you could eat. Seriously, I thought this stuff was ornamental.
We've made carrot soup a couple of times. I've used fresh tarragon, oregano, and chives in soups and pasta dishes.
The apples and pears we ate out of hand. The onions, red and white, have been chopped, diced, sliced, and quartered.
I'm glad that we did this. We've eaten many things that I never would have looked at twice at the supermarket. I haven't liked them all. There are some I don't want to eat again. There are some that I've purchased again. I'm not sure we'll continue through the winter. What do you think?
Tuesday, November 11, 2008
TWD: Kugelhopf
Now, there were some people last week who were a tad unfamiliar with rugelach. This week was my turn to scratch my head. Here is an excellent NY Times article that gives some good information. I figured out that it is a sweet yeasted bread, similar to a brioche, but a little different. It even has its own pan. Which I did not buy. I had a lovely nine-cup Bundt Festival
This is a finished kugelhopf.
Anyway..... This was a good recipe, but I don't feel the need to really make this again. Now, had I actually really followed the recipe, I might have liked it better. To start, READ THE RECIPE! The ingredients weren't very fussy. I didn't have whole milk and used the skim that I had. I have a five-quart KitchenAid mixer. There wasn't quite enough dough to really follow the directions. My dough hook (the new one!) wasn't quite reaching the ingredients in the bowl. I used the flat beater instead. The mixing times were, to put it nicely, slightly long. I'm pretty sure that my mixer was running for a good 20-25 minutes. There was an interesting instruction: beat the dough until it climbs up the hook. You know my new dough hook? DOUGH DOES NOT CLIMB IT! But after all the mixing, it looked pretty good. I added my dried mixed fruit (blueberries, cranberries, golden raisins, and cherries) and set it aside to rise. It did actually double in about 90 minutes. Then for the next two hours you have to slap it around until is stops rising. I did this Friday night, and put it in the fridge to be ready to bake on Saturday.
Well, Saturday came along, and I just threw my bowl from the fridge into the oven (unlit. that's where I put dough to rise) to do its two hour rise. This is where reading the recipe would have been a good thing. See, I was supposed to put the dough in the pan and then let it rise. Because when you let it rise in a bowl and then transfer it to a pan, it deflates. I figured at that point that I didn't have much to lose. So I stuck it in the fridge and left it for Sunday.
Sunday morning, I put the dough, now in the pan, back in the oven to rise. Three hours later it had risen some. I set the oven, took over the wax paper, and hoped for the best. I followed the baking instructions, and what I got was a pretty nice looking bread. I did the butter/sugar topping, and we let it cool as long as we could. I forgot the powdered sugar, but I don't think it mattered. The boy, the girl, and the husband all gave it a big thumbs up. I enjoyed it as well. It certainly didn't last long. It was a cross between a croissant and a brioche. Kind of flaky and buttery with a delicate crumb. The four of us finished it in a day. While I did enjoy it, I thought it was quite fussy for what it was. Yes, I made a mistake. Even so, for all the rising time and slapping and mixing, it wasn't worth the work. I'm glad to have made it, though. Now I know!
The finished product. Golden brown and delicious.
The boy's slice.
A cross section of the finished kugelhopf.
The girl's slice.
(If I posted one child's slice and not the other's, it would get ugly around here)
I'm glad that Yolanda of The All-Purpose Girl chose this, because I never would have picked it out on my own. You can get the recipe at her site if you'd like to try this one for yourself. Next week is not one I'm looking forward to. It's Arborio Rice Pudding. Rice pudding is not a food I ever want to eat. We'll see if Isa of Les Gourmandises d'Isa can get me to try it.
Tuesday, November 04, 2008
TWD: Rugelach
I love rugelach. I don't tend to make it very often, because I think of it as a time-consuming, difficult recipe. I've made a great rolled up version recently, but I haven't made the crescents in a looooooong time. This recipe could get me to change my mind.
The dough was incredibly easy to make. It came together very quickly in the food processor. I divided it into two discs and put it away overnight. I decided to make two versions. One was with apricot jam and pistachios. The other contained almonds, raspberry jam, and chocolate chips.
The construction of the cookies was both fussy and forgiving. The fussy part: For future reference, I need to make sure my nuts and chips are chopped into smaller pieces. It made it tough for me to cut my dough circle into wedges. I kept running into too-large pieces and it gummed up the works some. The layers of ingredients (jam, then cinnamon sugar, then nuts, then chips) made for quite a bit of juggling. There was a lot going on. The forgiving part: My "circle" was not too precise. And my wedges were a little less than even. But when you roll it up, it gets pretty well hidden. I enjoyed the sweetness of the apricot jam paired with the pistachio. Remember, the dough has no sugar, so the toppings are what bring the sweet. I did forget to sprinkle the cinnamon sugar mixture on the raspberry jam version. Truthfully, we didn't miss it.
Here's an apricot pistachio version.
Here's a shot with both flavors.
And a little further away shot.
On the boy's scale, these were an 11. (It goes to 11. It's one louder than ten) The rest of the family enjoyed them as well. I would certainly make these again. I'm thinking of new jam/nut combinations.
Thank you Piggy, from Piggy's Cooking Journal for choosing this great recipe. Next week's goodie: Kugelhopf chosen by Yolanda of The All Purpose Girl. This one may require a new pan. We'll see.....
Wednesday, October 29, 2008
Cookie Carnival: Pumpkin Whoopie Pies
Whoopie Pies is just so much fun to say. Almost as much fun to say as it is to eat. Yum! These lovely little pillows of chocolate cookies are, to say the least, tasty.
If you are interested in making these, here's the recipe!
Mini Pumpkin Whoopie Pies
Makes about 20.
INGREDIENTS
FOR THE COOKIES
* 1 3/4 cups all-purpose flour
* 3/4 cup unsweetened cocoa powder (not Dutch-process)
* 1 1/2 teaspoons baking soda
* 1/2 teaspoon coarse salt
* 1 tablespoon unsalted butter, softened
* 1/4 cup vegetable shortening
* 1/2 cup granulated sugar
* 1/2 cup packed dark-brown sugar
* 1 large egg
* 1 cup whole milk
* 1 teaspoon pure vanilla extract
FOR THE FILLING
* 4 ounces cream cheese, at room temperature
* 1/2 cup (1 stick) unsalted butter, at room temperature
* 1/2 cup confectioners' sugar
* 1/4 cup canned solid pack pumpkin
* Pinch of cinnamon
* Pinch of nutmeg
DIRECTIONS
1. Prepare cookies: Preheat oven to 375 degrees. Sift together flour, cocoa powder, baking soda, and salt into a medium bowl; set aside.
2. Place butter, shortening, and sugars into the bowl of an electric mixer fitted with the paddle attachment. Mix on high speed until smooth, about 3 minutes. Add egg; mix until pale and fluffy, about 2 minutes. Mix in half the flour mixture, then the milk and vanilla. Mix in remaining flour mixture.
3. Drop about 2 teaspoons dough onto baking sheets lined with parchment paper, spacing 2 inches apart. Bake until cookies spring back when lightly touched, 12 to 14 minutes. Transfer baking sheets to wire racks and let cool 10 minutes. Remove cookies from baking sheets and transfer to wire racks using a spatula; let cool completely.
4. Prepare filling: In the bowl of a mixer fitted with the paddle attachment, whip together cream cheese, butter and confectioners' sugar on medium speed until smooth, about 3 minutes. Add pumpkin, cinnamon, and nutmeg; whip until smooth, scraping down the bowl as necessary.
5. Pipe or spoon about 2 teaspoons filling on the flat sides of half the cookies. Sandwich with remaining cookies, keeping the flat sides down.
I'm not a fan of pumpkin. At all. But the pumpkin flavor was so mild, I didn't mind it. Having said that, I would absolutely make these again with a different, stronger flavored filling. Peanut butter, strawberry, and mint come to mind.
The cookies were easy to put together. I don't even think I used a mixer. My husband's office got this batch. We didn't quite need them at home.
Another close up of dessert goodness.
Thanks Kate and the Cookie Carnival gang for such a nice choice. I'm looking forward to November!
If you are interested in making these, here's the recipe!
Mini Pumpkin Whoopie Pies
Makes about 20.
INGREDIENTS
FOR THE COOKIES
* 1 3/4 cups all-purpose flour
* 3/4 cup unsweetened cocoa powder (not Dutch-process)
* 1 1/2 teaspoons baking soda
* 1/2 teaspoon coarse salt
* 1 tablespoon unsalted butter, softened
* 1/4 cup vegetable shortening
* 1/2 cup granulated sugar
* 1/2 cup packed dark-brown sugar
* 1 large egg
* 1 cup whole milk
* 1 teaspoon pure vanilla extract
FOR THE FILLING
* 4 ounces cream cheese, at room temperature
* 1/2 cup (1 stick) unsalted butter, at room temperature
* 1/2 cup confectioners' sugar
* 1/4 cup canned solid pack pumpkin
* Pinch of cinnamon
* Pinch of nutmeg
DIRECTIONS
1. Prepare cookies: Preheat oven to 375 degrees. Sift together flour, cocoa powder, baking soda, and salt into a medium bowl; set aside.
2. Place butter, shortening, and sugars into the bowl of an electric mixer fitted with the paddle attachment. Mix on high speed until smooth, about 3 minutes. Add egg; mix until pale and fluffy, about 2 minutes. Mix in half the flour mixture, then the milk and vanilla. Mix in remaining flour mixture.
3. Drop about 2 teaspoons dough onto baking sheets lined with parchment paper, spacing 2 inches apart. Bake until cookies spring back when lightly touched, 12 to 14 minutes. Transfer baking sheets to wire racks and let cool 10 minutes. Remove cookies from baking sheets and transfer to wire racks using a spatula; let cool completely.
4. Prepare filling: In the bowl of a mixer fitted with the paddle attachment, whip together cream cheese, butter and confectioners' sugar on medium speed until smooth, about 3 minutes. Add pumpkin, cinnamon, and nutmeg; whip until smooth, scraping down the bowl as necessary.
5. Pipe or spoon about 2 teaspoons filling on the flat sides of half the cookies. Sandwich with remaining cookies, keeping the flat sides down.
Tuesday, October 28, 2008
No Chocolate Chocolate Cupcakes for TWD
Sorry folks. Instead of baking, I went on a cruise to the Bahamas with my husband. Grown-up time beat chocolate cupcakes hands down.
Clara of I Heart Food 4 Thought had a lovely idea to decorate these cupcakes in a Halloween theme. Check out her blog and the recipe.
Next week I'll definitely being making Rugelach. Thanks, Piggy from Piggy's Cooking Journal for choosing that one.
Tuesday, October 21, 2008
TWD: Pumpkin Muffins
We were so very seasonal this week! I have a little confession to make. I don't like pumpkin. I don't like pumpkin pie. A recipe for pumpkin ginger tea cake sounded really good, but, have I mentioned that I don't like pumpkin? Thank goodness there are three other people around here who eat pumpkin baked goods!
This was an easy enough recipe. There were quite a few ingredients, but my assistant was able to handle it all easily. She especially liked the stirring. We substituted almonds and regular raisins for the walnuts and golden raisins because that's what we had.
The scooping with the ice cream scoop and the sprinkling of the seeds was pretty fun as well. If you don't use an ice cream scoop for muffins or cupcakes, you should. It's very handy.
We actually got quite a few more muffins than the recipe called for. Here is a close-up of an unbaked muffin.
Here it is baked. Still working on my photography skills. White on white = a no no.
The muffins smelled great while they were baking. The rest of the family really enjoyed them. They did think that the sunflower seeds didn't add a whole lot. I did take a taste. While they weren't bad, I don't think I'll be eating them again.
Thanks to Kelly of Sounding My Barbaric Gulp for getting me to try something new. She'll also have the recipe on her site if you are interested. Next week: Clara of I Heart Food 4 Thought has chosen Chocolate Chocolate Cupcakes.
Tuesday, October 14, 2008
TWD: Lenox Almond Biscotti
Aaaaannnnnd, we're back to cookies. But that's ok! I like biscotti. I like almonds. This wasn't my most successful recipe, but I'd certainly give it another try.
This was a pretty simple recipe. It was fairly straightforward. I ran out of almond extract after only using one teaspoon, so I substituted vanilla for the other half teaspoon. The logs formed pretty easily. When Dorie said this was a sticky dough, she was not kidding!
I baked it according to directions. Apparently, that was wrong. It needed much more baking time than originally suggested. I took it out, let it cool for 15 minutes, and then tried moving it to the cutting board. Big mistake. It was still pretty raw in the middle. I shoved it back in the oven for a good ten minutes and then took it out again. It looked more golden brown. I let it sit for another fifteen minutes, and then I tried to move it and cut it.
It still did not like being moved, and it proceeded to fall apart. I was too annoyed at that point, so I salvaged the slices that I had and put them and the remaining lumps back on the sheet to put in the oven.
Here's a close-up that is a testament to the under-doneness that is my biscotti.
And this is what it ended up looking like after the third bake. Some pieces were very biscotti-like!
All in all, I enjoyed this cookie. I liked the crunch of the cornmeal that was a problem for some of the other bakers. I would certainly try this again using some other flavor combinations. And, I would bake it for a longer time the first go round.
Thank you to Gretchen of Canela & Comino for picking this recipe. Next up: Pumpkin Muffins chosen by Kelly of Sounding My Barbaric Gulp.
EDITED TO ADD: I made these again. This time I refrigerated the logs overnight, baked them for an additional 12 minutes for the first bake, and added six minutes to the second bake. I also added orange peel with the sugar and some chocolate chips. The extra time made all the difference. Excellent!
Sunday, October 12, 2008
You can make homemade baklava
This is one of THOSE foods. The one that looks incredibly complicated. The really impressive one that makes everyone say, "No way! You made this?!" or, "Ooooooh, I could never make that!" But, the truth is, yes, you can.
Baklava is incredibly time consuming, but it's actually pretty easy. There are two main components. There is the pastry/nut component and the syrup component. The pastry/nut side of things is phyllo dough (purchased and thawed, couldn't be easier), chopped nuts, cinnamon, and, melted butter.
Initially, you cut a package of thawed phyllo dough in half. It fits very neatly in a 13 x 9 pan. Mix the nuts and the cinnamon. Get a brush for the butter. That's it.
Here it is. Pan. Nuts and cinnamon. Melted butter. Phyllo dough.
You brush a layer of butter in the pan. Then layer in a sheet of dough. Brush more butter to cover. Then layer in another sheet of dough. Yup, more butter to cover.
At this point, you sprinkle on 2 T. of the nut mixture.
Then the layering starts again. Dough. Butter. Nut mixture. You do this until all of the nuts are gone. Then make six or so layers of dough and butter. Don't be stingy with the butter. It's one of the best components. Occasionally, I run out. Just melt a little more and continue.
Just a note about the phyllo. I know this is the sort of thing that can be very scary. It's not. In this recipe, especially, it's very forgiving. If it tears, so what. It's just going to be covered with more nuts and butter! When you are between layers, I cover it with some plastic wrap to keep it from drying out. Ok, actually, now that I've made this a bunch of times, I don't tend to cover it because I work pretty quickly. If you are nervous, however, cover.
The next step was a little surprising the first time I made this. You actually cut the baklava BEFORE you bake it. I know! Isn't that interesting!
This is what it looks like before it is baked. Another little hint: these pieces are kind of big. I usually cut them smaller.
This is what it looks like after it is baked. MMMmmm. Toasty and delicious. But not done yet!
While it is baking, you have another step. The sweetness comes from a honey/sugar syrup. The beauty of the syrup is that you can make it to your likeness. I'm not a huge fan of honey, so I use more sugar than honey. Once the pan is out of the oven, you evenly pour the syrup over the hot baklava. Tricky! You'll hear an amazing sizzle as the syrup lovingly coats all the flaky, delicious layers.
Here is what it looks like when it's done. More mmmmmmm.
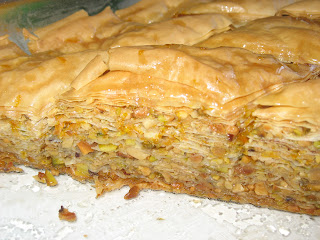
And here is a close up of the flaky, delicious layers. Even more mmmmm.
It can be done. And it can be done well. Try it! You'll like it!
Julie's Baklava
1 package frozen phyllo dough, thawed according to directions and cut in half to fit a 13 x 9
1 pound toasted, chopped nuts (I use pistachio and almond)
1 t. cinnamon
1 1/2 sticks butter, melted (may need more)
Pre-heat oven to 350 degrees. Mix nuts and cinnamon. Brush bottom of 13 x 9 pan with butter. Layer phyllo, nuts, and butter until nut mixture is gone. Cover with six layers of phyllo and butter. Bake for 50 minutes or until golden brown. While the pastry is baking, make the sugar/honey syrup.
1 c. granulated sugar
1 c. water
1/2 c. honey
1 t. vanilla
1 t. lemon or orange zest
Combine the sugar and water. Bring to a boil. Add the rest of ingredients and simmer uncovered for about 20 minutes. Spoon the hot syrup over the hot pastry.
Store UNCOVERED! Otherwise, it gets soggy.
Subscribe to:
Posts (Atom)